How To Imitate A Marvel Movie Opening Scene In Premiere Pro: From Storyboard To Cinematic Action
How To Imitate A Marvel Movie Opening Scene In Premiere Pro: From Storyboard To Cinematic Action
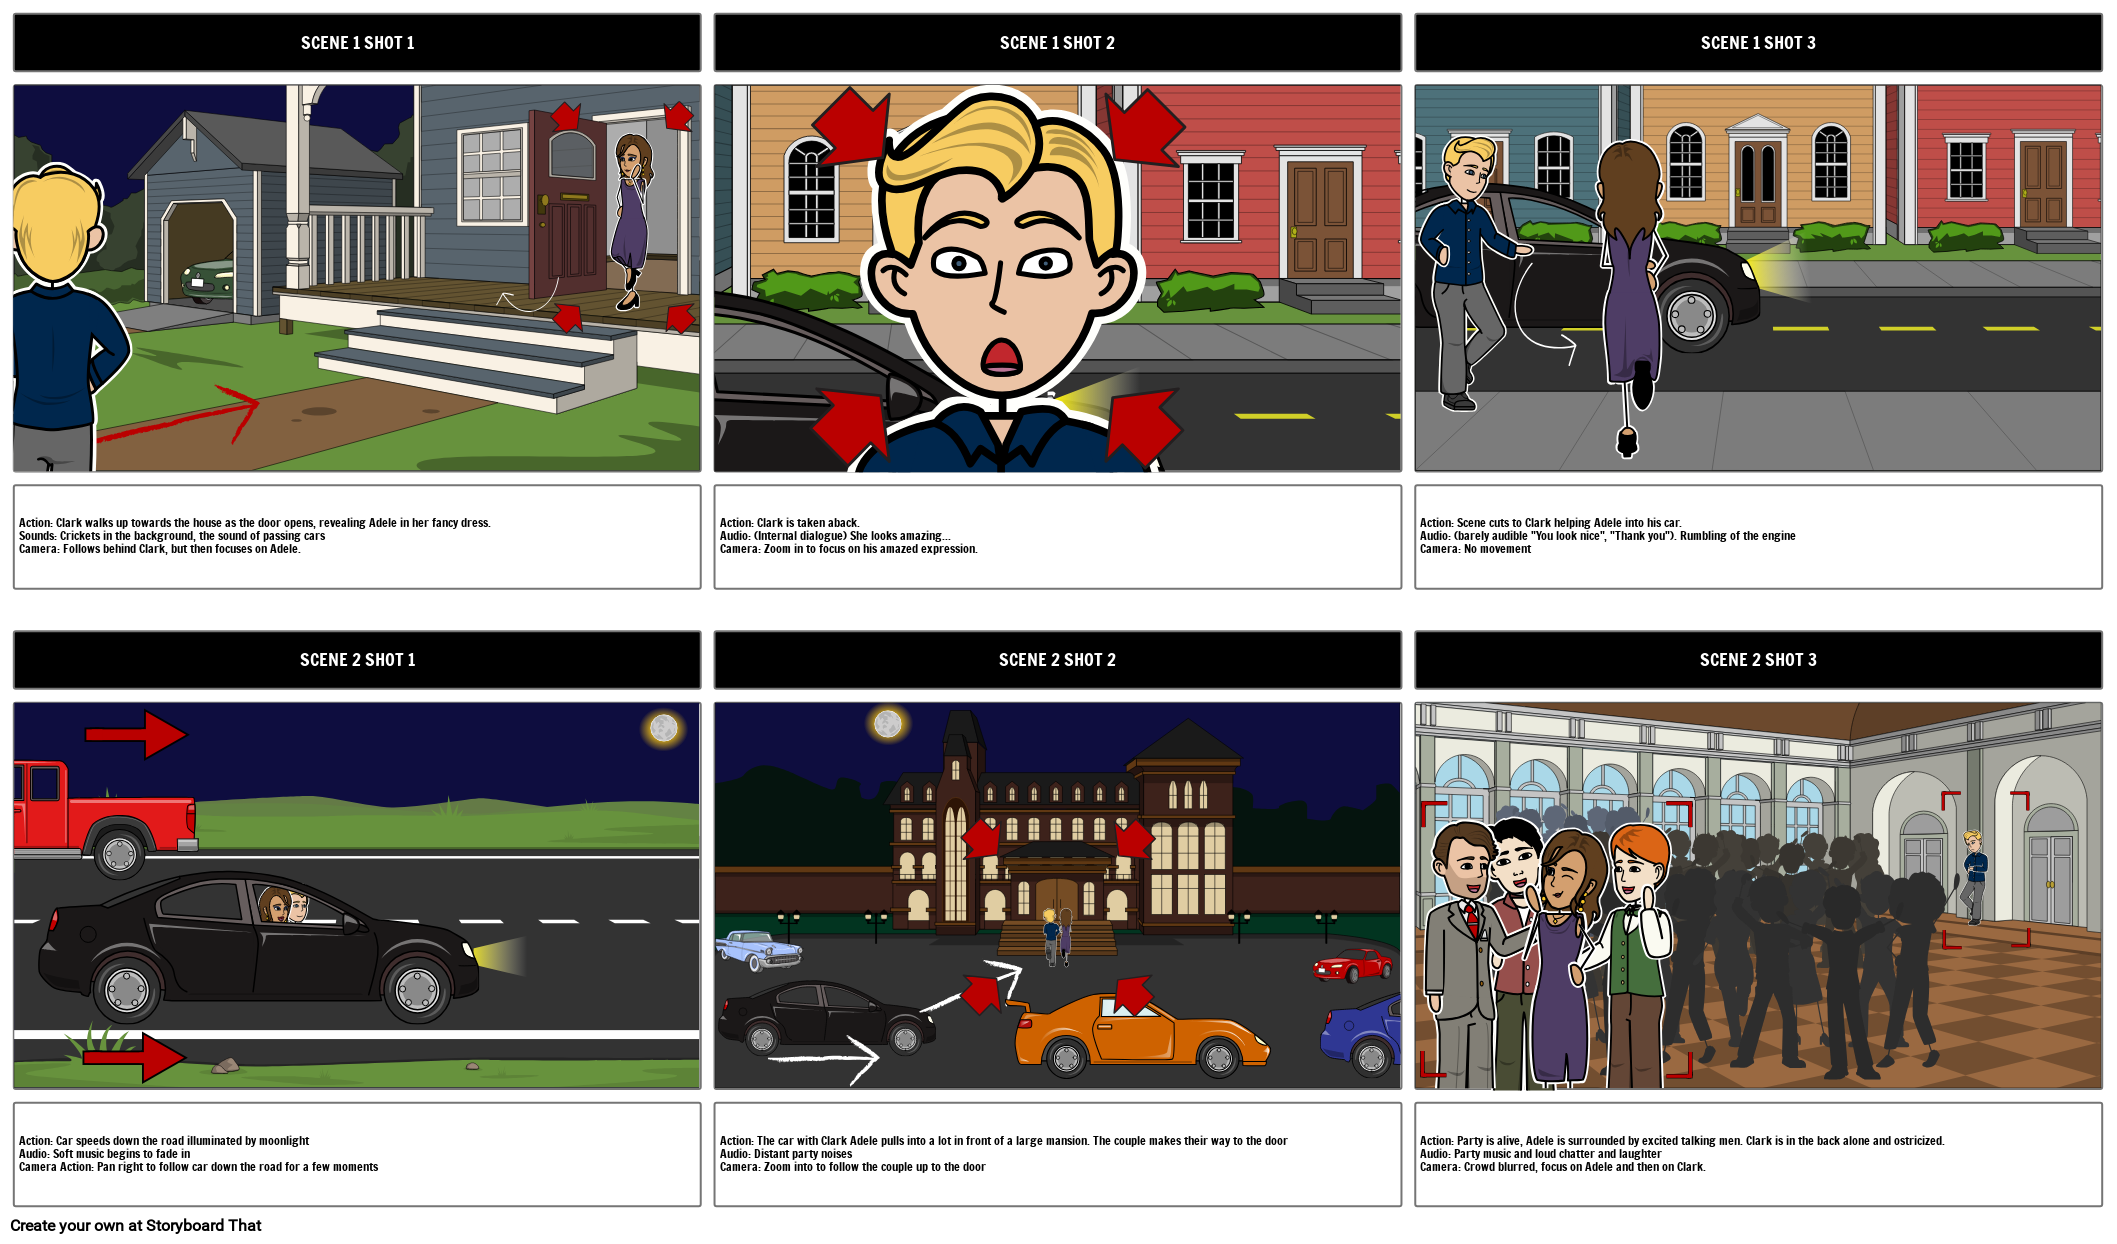
From explosive hero reveals to pulse-pounding intensity, Marvel’s opening scenes set a benchmark for cinematic bombast. Replicating that energy in Adobe Premiere Pro isn’t just about mimicking effects—it’s about translating the precision of a storyboard into live-action cinematic rhythm. This guide reveals the exact workflow to craft a Marvel-style opening in Premiere Pro, blending storyboard planning, dynamic editing, sound design, and visual spectacle—no special effects knowledge needed, just technical know-how.
At the heart of any great Marvel film launch lies a meticulously structured storyboard. Before opening a single sequencer, map each moment with cinematic clarity: hero entrance, dramatic lighting cues, sweeping camera moves, and character focus. “A strong storyboard acts as a blueprint,” says production designer Elena Voss, “it’s where visual language begins—every angle, duration, and beat informs how sound and edit will breathe life into the frame.” Use tools like StoryboardX or hand-drawn sketches with time stamps to define beats.
A typical Marvel opener lasts 60–90 seconds, so every second must justify its presence: a bold title, a devastating strike, or an emotional character reveal. Break the scene into discrete acts—setup, conflict, climax—and assign precise editing markers in Premiere Pro to sync music, visuals, and sound design.
Once storyboards lock, the next phase is importing footage, stock shots, and overlays—often shot with steadycam or drone for fluid motion—then sequencing them within Premiere Pro’s timeline.
The Marvel style thrives on kinetic energy and cinematic framing. Begin with a wide establishing shot—ideally captured at high frame rate—to emphasize scale. “Marvel doesn’t just show action—they make you feel it,” notes editor Marcus Reed.
“Use camera tracking overlays and motion graphics to emulate that seamless immersion.” Layer in dynamic transitions like match cuts, radial zooms, and chained zooms from wide to close-up, mimicking the sweeping energy of a live stunt sequence. Use Premiere’s Keyframe Animator to simulate camera push-ins or rotations that build tension before the hero’s first line.
Sound design is as crucial as visuals in a Marvel opener.
Match the pacing of an explosive score—dramatic stings at beats, rising intensity during the action, silence for emotional weight. Close with a microphone-adjacent cap: a sharp close-up on a character’s face, eyes wide, breath held. “Every frame must serve sound,” advises sound mixer Naomi Lin.
“A well-placed whisper after silence creates a tension no visual can replicate.” Incorporate diegetic sounds—explosions, footsteps, gunfire—edited in sync with cuts. Use Premiere Pro’s audio waveform syncing and Noise Reduction tools to achieve crisp, immersive audio.
Visual effects in a Marvel-style opening rarely rely on flashy CGI at early stages—instead, leverage in-camera techniques and subtle compositing.
Apply verbal slow motion during key moments (e.g., a fist striking diamond) to mimic slow-mo transitions common in Marvel films. Use Premiere’s Lumetri Color for mood lighting: cool tones for suspense, warm highlights for intensity. Overlay text with sans-serif fonts—often custom or bold—using the Essential Text panel.
Match typography rhythm to music beats: fast cuts with rapid text stings, slower reveals with lingering glyphs. “Subtlety sells,” says visual effects supervisor的时候时. “A flicker in light, a shift in lens tint, or a dust particle trailing in slow motion can make a frame feel Marvel-grade.”
Advanced editing tricks simulate the hyper-kinetic pacing of blockbuster openings.
Use Premiere’s Dynamic Link with After Effects via the Composition Share feature to animate particle effects or motion blur directly inside Premiere. Automate speed ramps—gradually increasing playback speed at critical moments—to mimic editorial urgency. For multi-cam setups or actor retakes, use key edits and sequence merges to maintain continuity without losing cinematic momentum.
“Every re-take must reinforce the scene’s emotional core,” notes the director of a recent indie Marvel homage. “Editing is your storytelling tool—push and pull rhythm like a heartbeat.”
To replicate the sequence, follow this practical workflow: 1. Draft a storyboard with scene beats, timing, and visual goals.
2. Organize source footage, overlays, and sound assets in Premiere Pro bins. 3.
Sequence shots with dynamic camera-like movements—zoom, pan, tilt—using the Razor Tool and Pin Tool. 4. Apply color grading with dramatic contrast and cinematic presets (e.g., Warner Bros.
Logo Color). 5. Synchronize sound design to edit decisions—dialogue, SFX, music—it’s a synchronized symphony.
6. Animate typography using Quantify and Keyframe controls for rhythmic visual punch. 7.
Apply minor effects: lens flares (subtle), lens distortion for realism, lens shake for chaos. 8. Final pass—review timing, audio syncing, and emotional arc; refine until cinematic polish.
Mastering Marvel-style openings in Premiere Pro is not about copying kits, but internalizing rhythm, pacing, and emotional resonance. By fusing disciplined storyboarding with dynamic editing and layered audio, creators transform raw footage into indestructible cinematic moments. The result is a sequence that doesn’t just launch a hero—it demands attention, sparks imagination, and echoes the thunder of the cinematic titans.
In the world of digital storytelling, that’s how you build your own literary blockbuster—frame by frame, beat by beat.


Related Post

Megyn Kelly’s Strategic Measurements: How Precision Shaped Her Media Empire
Jim Nantz’s Private Life: Courtney Richards, R; A Wife Rooted in Stability
How Sarah Rafferty’s Children Are Outgoing: The Proven Impact of Early Social Confidence

Age, Age, Age: The Sweet Wisdom Behind Birthday Cake Sayings


